
Introduction
Digital content is the king. Record, run video editing software, upload to a resource like YouTube or Rumble, and it will stay there forever. There are many benefits in recording and sharing knowledge via video: it can improve the speaker’s ability to deliver material, anybody can see it again and again. This blog post is going to cover a number of easy-to-follow steps to do video editing using TechSmith Camtasia.
Problem
Let’s talk about video editing. Making video content is usually split into 2 phases – pre-production (recording) and post-production (perfecting). While recording video is fairly obvious and mostly involves hitting the red record button, perfecting video is usually a time-consuming and scary process. Let’s make it easy. The following steps and screenshots will help you to get up to speed in creating video content as quickly as possible.
Solution
- Add media artifacts
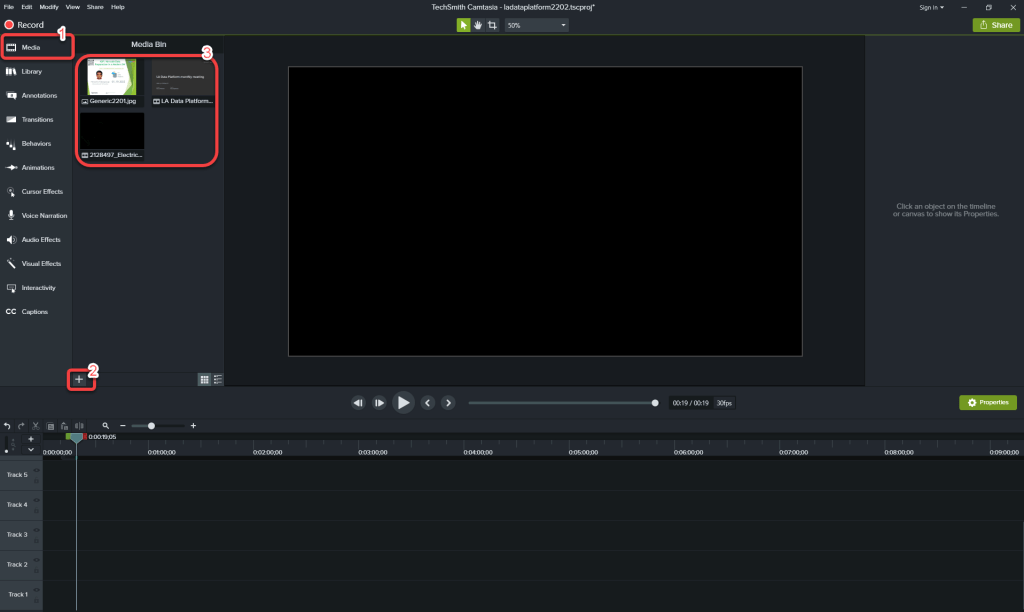
Start with downloading the mp4 from MS Teams. Now proceed with opening Camtasia and add a thumbnail, downloaded video, and intro (see Fig #1).
- Add media artifacts to a track
Drag and drop media artifacts from the Media Bin into Track1 in the following order intro, thumbnail, and then video (Fig #2). Make sure that all 3 are stacked up one after the other, meaning that there is no space between them.

- Edit the video to lose anything that is not important
Left double-click on the video, drag the red time tracker, and then choose Cut (Fig #3).

- Remove noise
Apply noise reduction audio effect to remove any undesired noise from the recorded video by Clicking Audio Effects, choosing Noise Removal, and dragging and dropping it to the video.

- Make sure your video is perfect
Left double-click on the intro to bring back the triangle-shaped time tracker to the beginning, and hit the play button (Fig #5) to watch the entire video to make sure it’s all perfect.

- Make it a video file (mp4)
Choose Share from a menu item above, and then click on Local File (see Fig #6). Depending on your machine, dimension, and format as well as the TechSmith version, this step might take between 30-90 minutes.

- Enjoy it
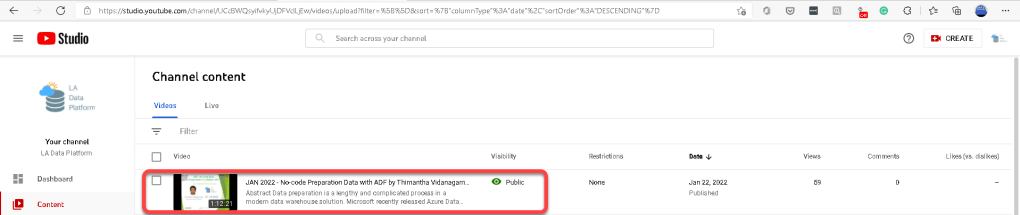
Create a YouTube account with a channel, upload your mp4 file, and let everyone know that it’s ready for public consumption (Fig #7). Don’t forget to make it public.
- Syndicate your content
While YouTube drives most of the viewers to channel, others platforms like Rumble are becoming more and more popular. Why not push your content to other platforms?
While you might think it’s not worth the time due to an effort that involves re-uploading your content, in reality, most YouTube competitors have a syncing capability built-in. Make your content available on YouTube, create an account in a competing platform, give that platform permission to access YouTube, and walla, your YouTube content will become available on the other platform as well.

Disclaimer
This blog post is made possible by two great products Snag-It and Camtasia by the TechSmith Corporation.

2 thoughts on “A TechSmith Camtasia video editing boot camp”